
How to set up an 8-week course in Ravini

Julie — this is the simplest way to build the two 8-week programmes: Menopause Reset and Change Your Relationship With Food.
There are three parts: the course lessons, one useful email when each week unlocks, and short daily prompts in a community channel. Set up the structure once, then repeat it for the second course.
Before you start
Have these ready:
- The course title and a short description.
- Eight weekly topics, with the lesson notes for each week.
- Eight short weekly email drafts.
- A bank of daily prompts — up to 56 per course.
- The community channel where members should talk.
1. Open Courses and create the course
In Ravini, open Community → Courses, then click New Course.
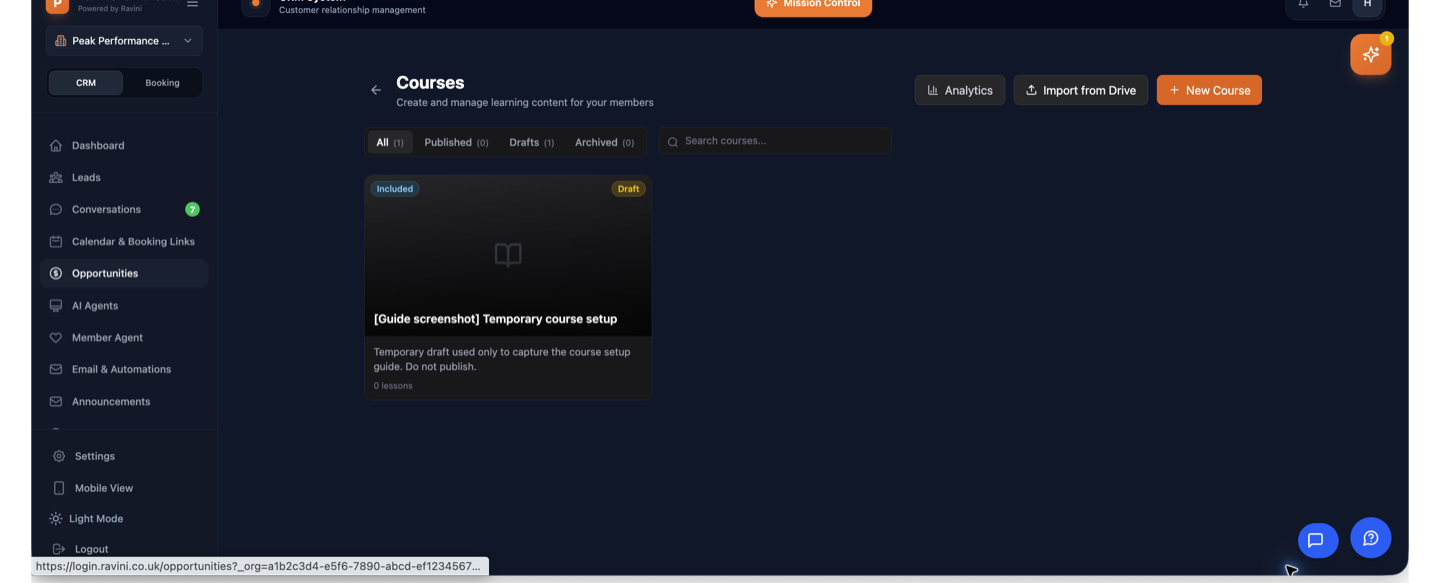
Open Community → Courses, then click New Course.
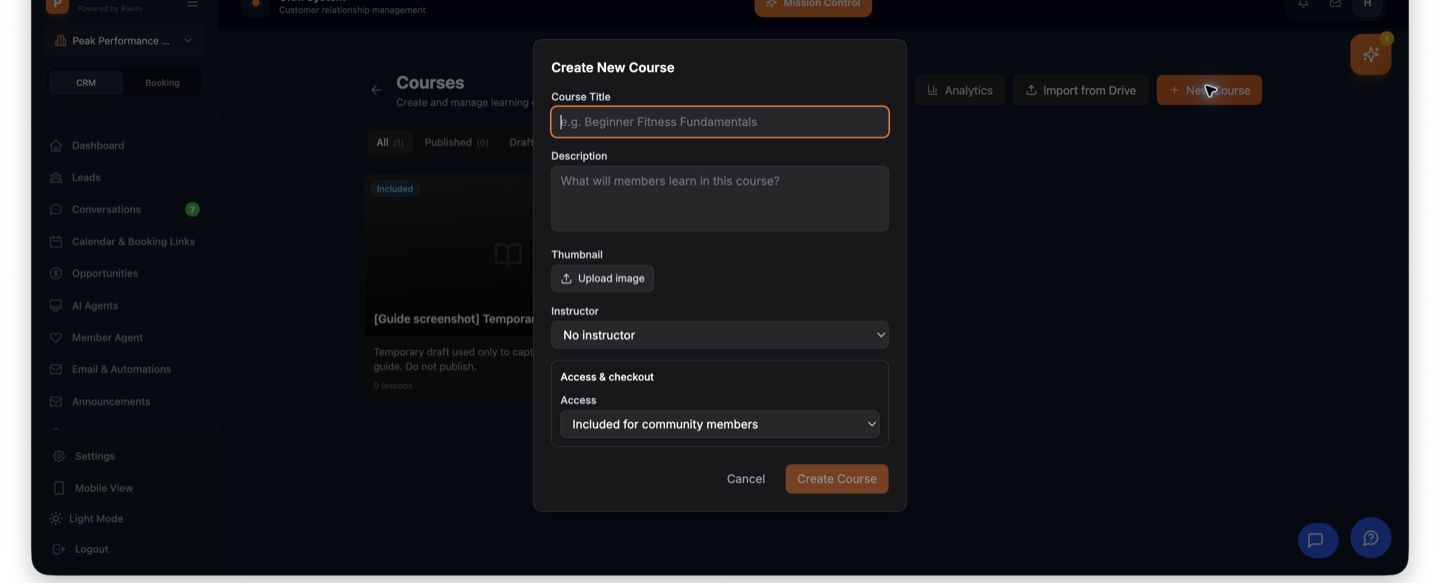
Add the title and description. For a member course, leave Access set to Included for community members.
2. Set the weekly starting point
Open the course and find Access & checkout. Choose Membership start date if each member should start Week 1 when they join. Choose First Monday on or after it if everyone should receive weekly tasks on a Monday.
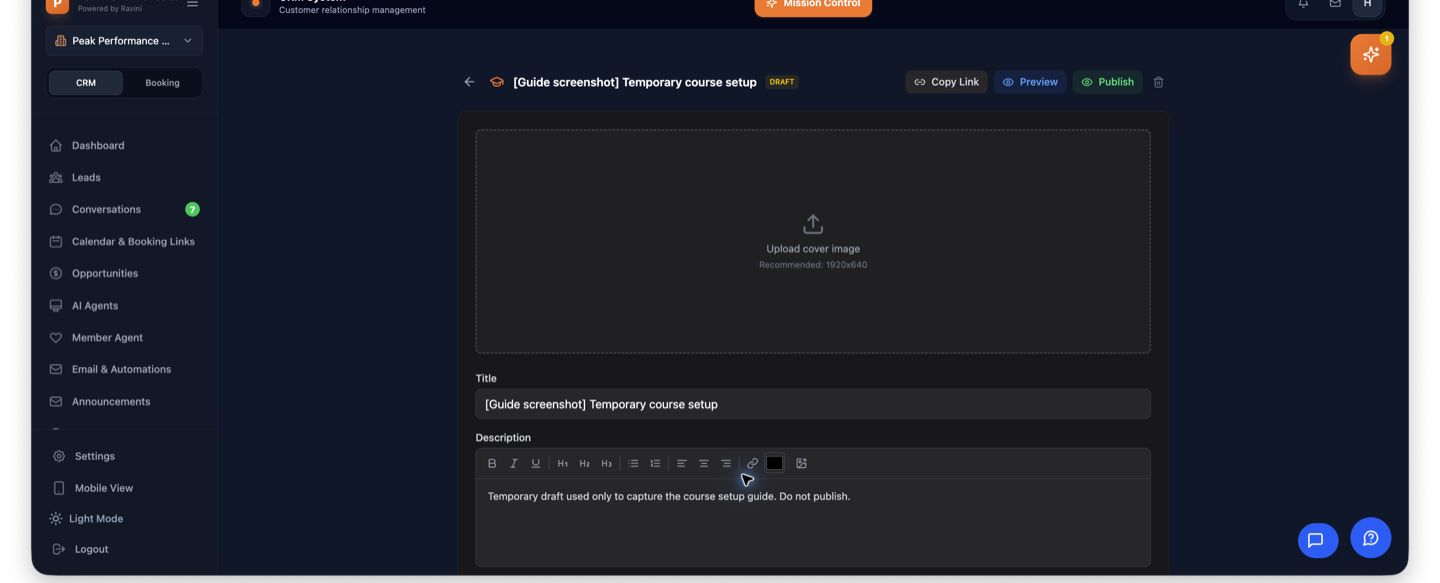
The course editor is where you add the cover, title and description.
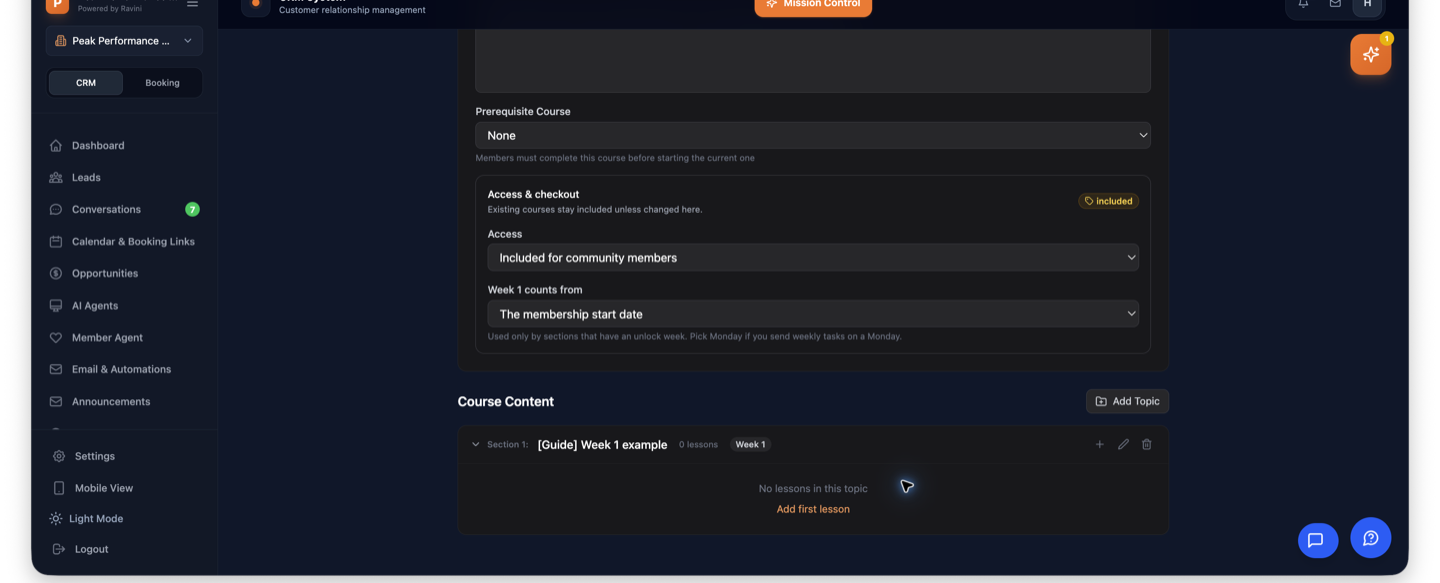
Choose how Week 1 is counted before adding the weekly content.
3. Add eight weekly topics
Click Add Topic once for each week. Name them Week 1 through Week 8, then set Unlocks in week to the matching number. Leave it blank only when a section should always be open.
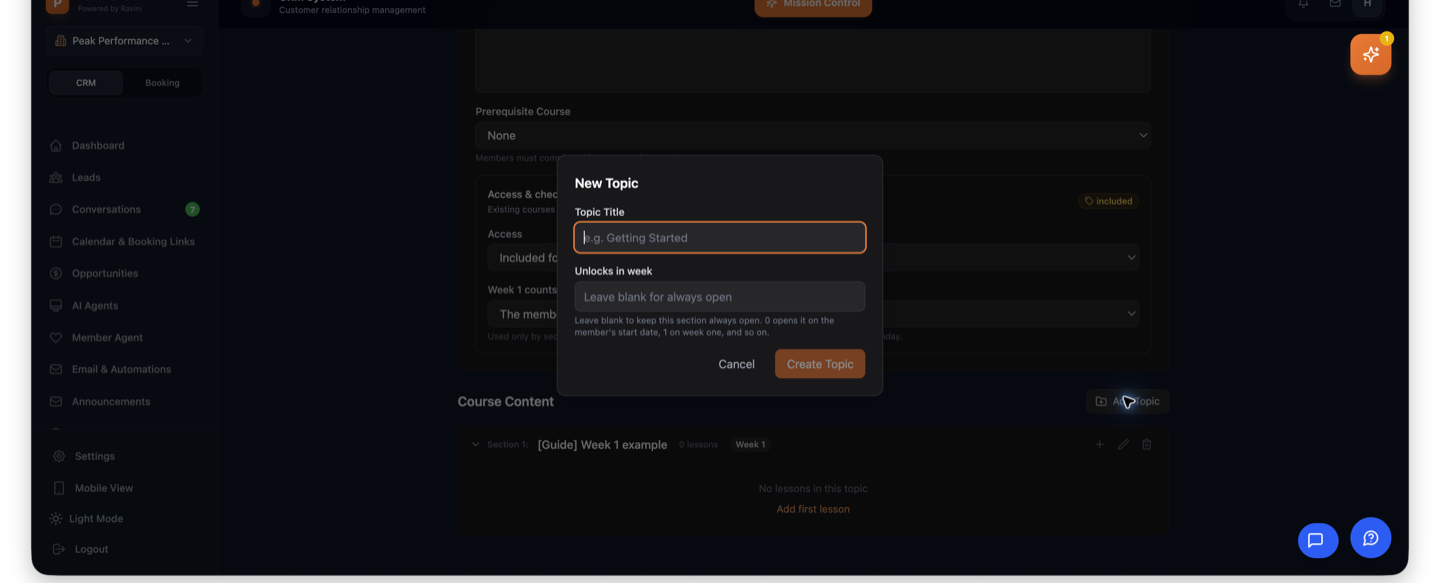
Create one topic per week and match the unlock week to its number.
4. Add the lessons
Inside each topic, click Add first lesson. Add the lesson title and explanation. A YouTube link and duration are optional, so a text-only lesson is fine.
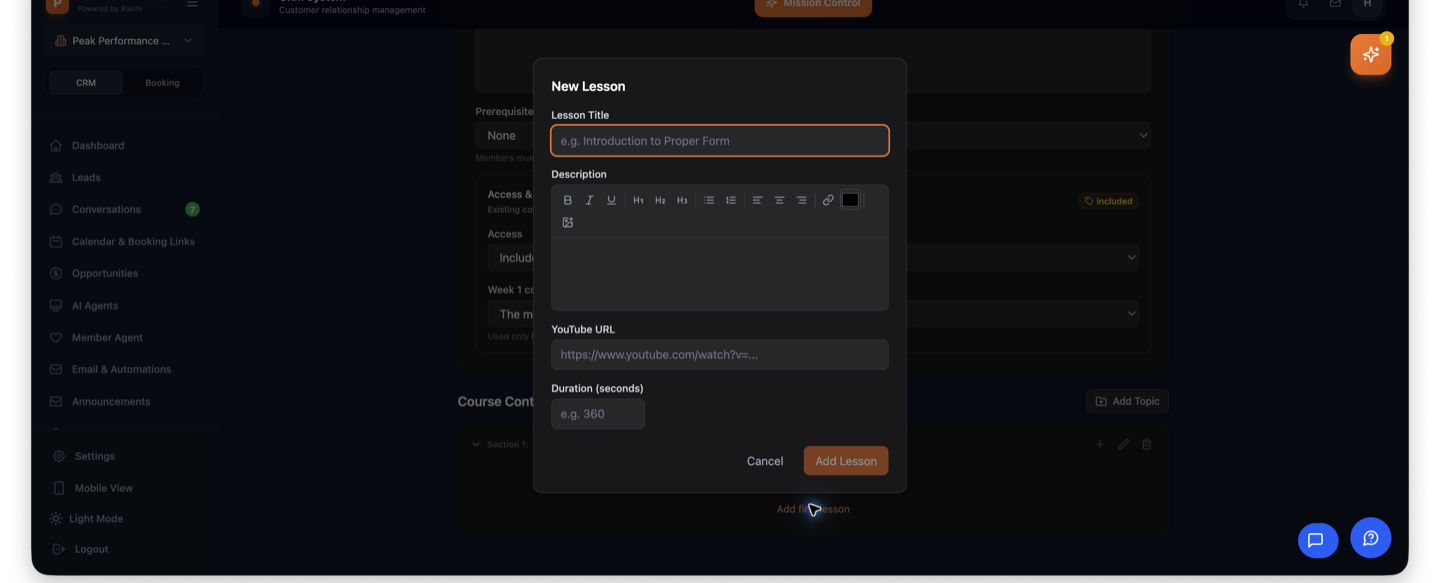
Keep each lesson focused: one idea and one clear action is enough.
A sensible eight-week shape
| Week | Theme | Member takeaway |
|---|---|---|
| 1 | Start here | Welcome, expectations and the first small action |
| 2 | Notice | A simple reflection or awareness exercise |
| 3 | Practise | One practical habit to try this week |
| 4 | Support | Troubleshooting, encouragement and a check-in |
| 5 | Build | A slightly more challenging next step |
| 6 | Reset | What to do when motivation dips |
| 7 | Review | Notice progress and adjust the plan |
| 8 | Continue | Celebrate, reflect and choose what happens next |
5. Set up the weekly email
In Email & Automations, create a workflow with the trigger Course Week Unlocked, then add Send Email. Write one email for each week, include the one action members should take next, and test it with one member before switching it on.
Simple rule: one weekly email, one main idea, one next step.
6. Add daily encouragement in Community
Create or use a channel such as Tips & Motivation. Prepare short prompts, then use Schedule message to place them on the right dates. The current composer schedules one post at a time, so prepare and schedule them in batches rather than looking for a recurring daily switch.
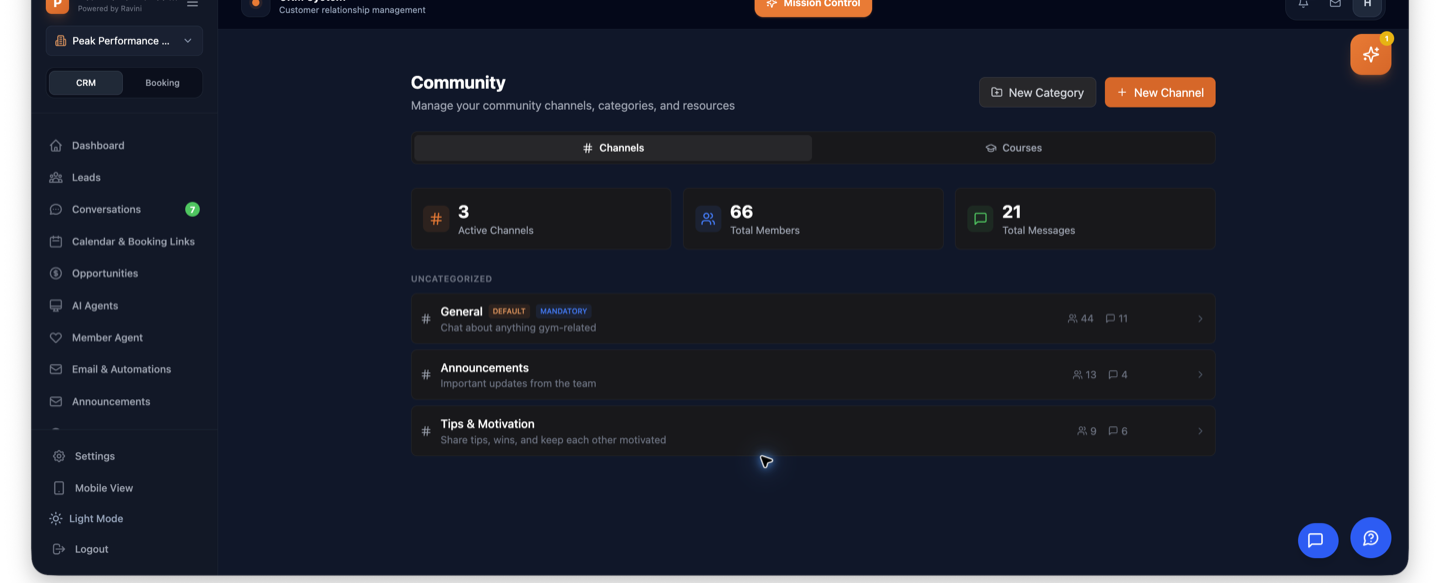
Choose the channel where members will receive their encouragement.

Click Schedule message, choose the date and time, then add the message.
A good weekly prompt rhythm is: Monday intention, Tuesday hint, Wednesday check-in, Thursday encouragement, Friday win, Saturday reminder, Sunday reset question.
Test before you publish
- Preview the course as a member would see it.
- Check that all eight topics unlock in the right order.
- Open one lesson on a phone-sized screen.
- Confirm the weekly email has the right link and next step.
- Schedule one chat post and check its local time.
- Only then click Publish.
Quick answers
Do I need a video for every lesson?
No. The lesson description can carry the teaching. YouTube is optional.
What if members join on different dates?
Use Membership start date so each person begins at Week 1 when they join. Use First Monday if you want everyone's weekly rhythm to line up.
Should I create one course or two?
Create two courses so the content, progress and email journey stay separate.
See Ravini with your own gym in it
Start a 14-day free trial, or book a 15-minute call and we'll show you exactly what switching looks like.